¶ Getting an USB ready
If you don’t already have it installed, download and install balena etcher from https://etcher.balena.io/
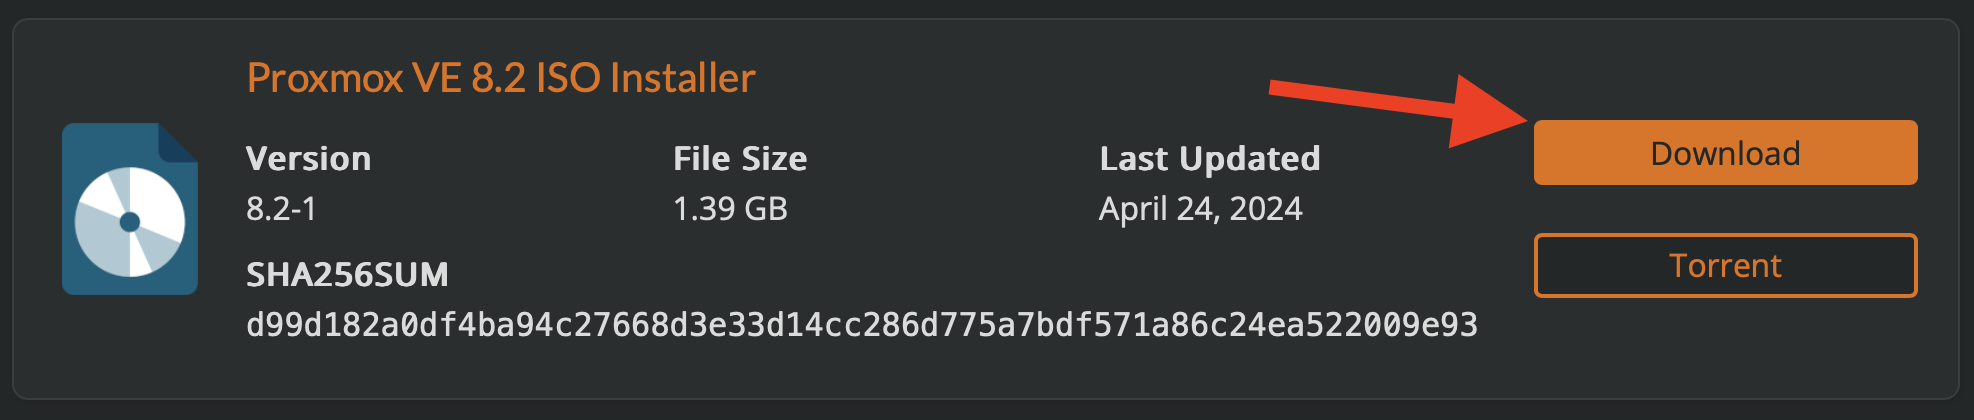
Download the Proxmox VE 8.2 ISO from https://www.proxmox.com/en/downloads/proxmox-virtual-environment/iso
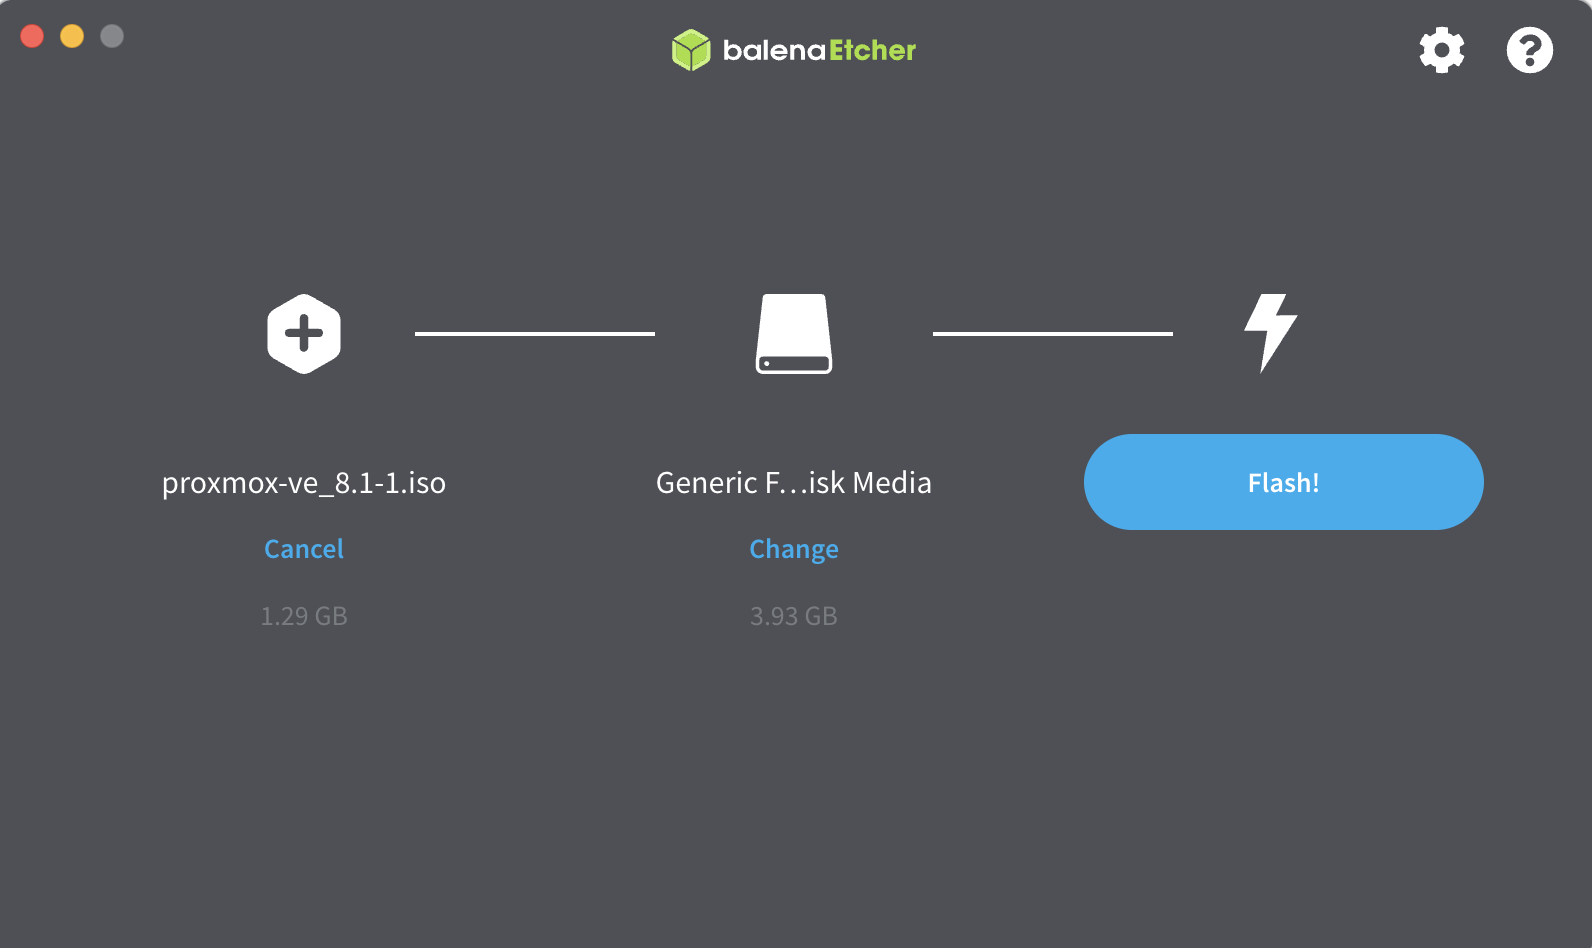
Launch balena etcher, and attach you USB flash drive to your Mac (or PC)
Select the .iso file you downloaded from Proxmox, and select the attached USB device and then click Flash!
Once the disk is flashed, you're all set for the next step.
¶ Install Proxmox on your hardware
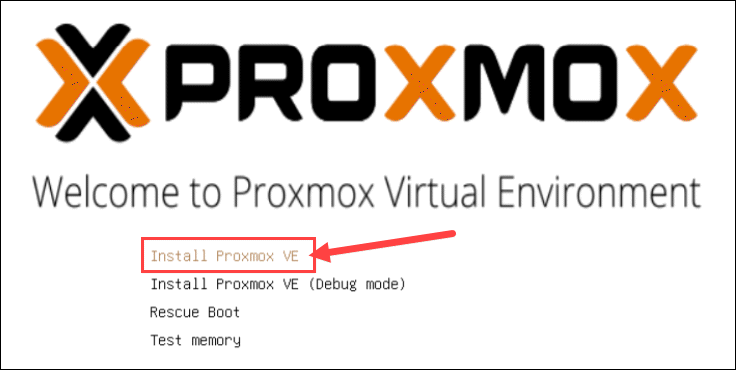
Insert the USB device containing the bootable Proxmox installer into your hardware, and boot from that USB device.
The Proxmox installer will start (with GUI).
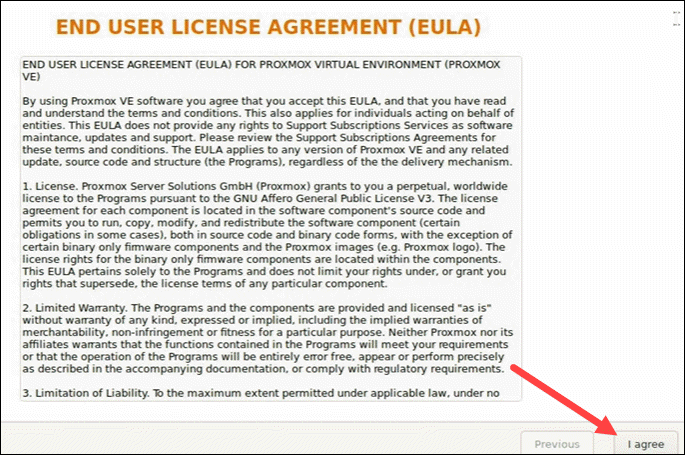
Read and accept the EULA to continue.
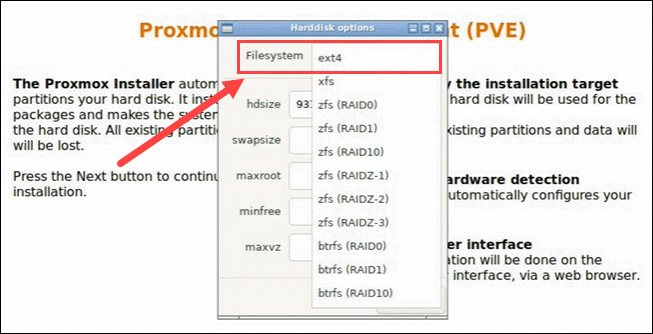
Choose the target hard disk where you want to install Proxmox. Click Options to specify additional parameters, such as the filesystem. By default, it is set to ext4.
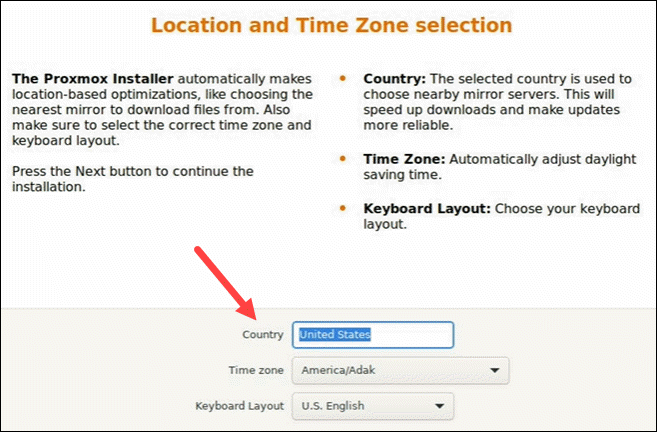
Then, set the location, time zone, and keyboard layout. The installer autodetects most of these configurations.
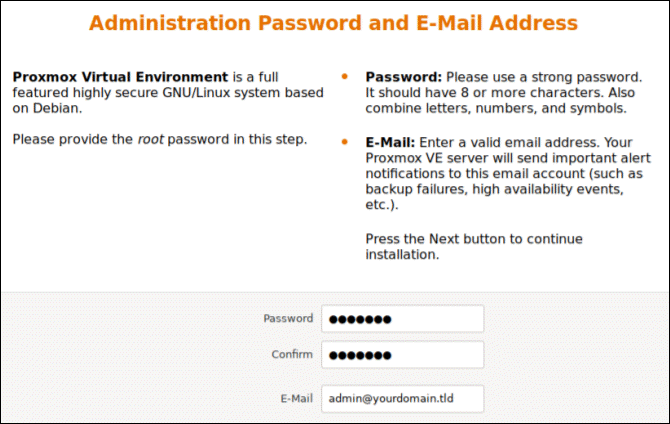
Create a strong password for your admin credentials, retype the password to confirm, and type in an email address for system administrator notifications.
The installer summarizes the selected options. After confirming everything is in order, press Install.
After the installation is complete, remove the USB drive and reboot the system.
Once the installation is completed and the system rebooted itself, the Proxmox GRUB menu loads. Select Proxmox Virtual Environment GNU/Linux and press Enter.
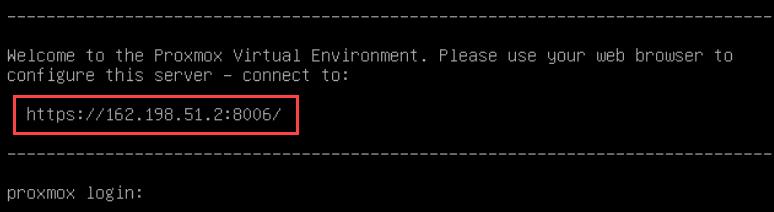
Next, the Proxmox VE welcome message appears. It includes an IP address which loads Proxmox. Navigate to that IP address in a web browser of your choice.
You are now ready to configure Proxmox.